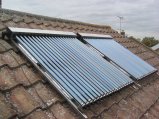
Solar Thermal installation

Another view of a sensor assembly
This is the actual sensor with some sleeving to avoid shorts on the pipe.
Close-up showing the 'in' and 'out' connectors.
These are trivial to wire up - Gnd, data and power go down 3 conductors on the veroboard.
This shows how the sensor is attached to the pipe. A bit of wire holds it in place and there is a dop of thermal paste between it and the pipe. As it is very close to the PHE itself there may be some tendency to measure the temp of the PHE overall rather than the water in the pipe.
View showing a pair - solar out on the left, Thermosiphon cold in on the right.
Now the insulation is fitted over the sensors.
I quickly realised that labelling each sonsor was a really good idea, as they all look exactly the same. That long number is the type and unique 64bit number they return to identify themselves on the 1-wire network. The tie-wrap holds the sensor board in place.
This is how I attached the tank sensors. Thermal paste on the sensor then a big blob of silcone over the top to glue it to the tank. Seems to work very well.
Here is the array of sensors down the height of the tank. You can see the bottom 4 of the 5 total here.
Final photo without ladders and ropes in view. Ladder was only up from April to end September :-)
The original dip in the solar loop before the PHE didn't allow for bleeding at this local high point, and I made it sping a slow leak as I tried to stuff insulation in so decided to improve this bit by adding a bleed point as well as soldering the 10mm pipe rather than using a compression fitting. Definately better.
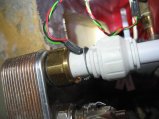
Perhpas the clearest view of the PHE. Solar loop on left, top in, bottom out. Thermosiphon on right, bottom in, top out.
Best pic of how the sensor is attached. Not very high tech and a bit fiddly to do. Spring clips would be better but I failed to find any low-enough profile to go under insulation.
This is my balloonboard controller mounted neatly on the wall (eventually)
The controller booting Linux. One day it'll get a nice pretty touch-control display.
The finished control/1-wire interface board, manual pump switch and 12V PSU.